

A place for Computer Scientists, Software Engineers, Programmers, Mobile Technicians, Hackers and other Geeks to share info create projects and learn important IT staff.
Recently

Friday, December 25, 2015
Friday, December 18, 2015

Thursday, December 10, 2015
Cloud_Commander ver 1.1 Beta
Hi guys,
I've been waiting for this day to come and finally it's here.
Today we release the beta version of Cloud_Commander ver 1.1.
Cloud_Commander is an android software but it can perform any console job, the software is supposed to be a replacement to the tonnes of android stuff e.g Rooting tools, common android tweaking scripts all crammed into one software .
What I mean is that this software will contain almost everything you here about android tricks since Devs will merge their own stuff here.
However you can create commands straight into the xml files which this software uses.
The commands created in this software will be stored in our server, if you use the other method (XML editing) which is not recommended, please share you files with your users.
As we finish designing this software it should make way for the development of PLATONIC ANTIVIRUS which has also been documented on this very blog.
EDIT:
I forgot to add some more info. So here it is :
For those who feel better working with xml files here is the structure.
This version has alot of bug fixes.
The easiest way
to send your xml files is to to paste the above xml in a file called
test.xml then open command creator and choose extract from test then you
can send/edit/test.
NB:MAKE SURE YOU UPDATE TABLES AFTER DOWNLOADING
All bugs should be reported to root@digital-dragons.net
RESERVED SHELL WORDS
box1 = This denotes the first user input box.
box2 = This denotes the next user input box.
squote = This denotes a single quotes(').
quote = This denotes double quotes (").
NB: PLEASE DON'T SEND COMMANDS THAT ARE NOT TESTED PERSONALLY!
SCANNED WITH BIT-DEFENDER ANTI-VIRUS
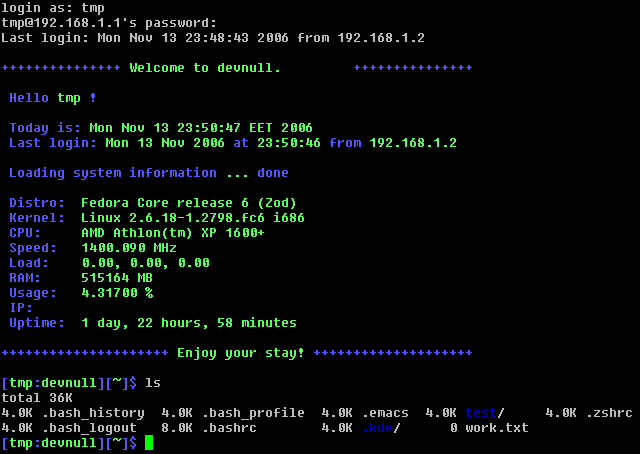
Screen shots:


I've been waiting for this day to come and finally it's here.
Today we release the beta version of Cloud_Commander ver 1.1.
Cloud_Commander is an android software but it can perform any console job, the software is supposed to be a replacement to the tonnes of android stuff e.g Rooting tools, common android tweaking scripts all crammed into one software .
What I mean is that this software will contain almost everything you here about android tricks since Devs will merge their own stuff here.
However you can create commands straight into the xml files which this software uses.
The commands created in this software will be stored in our server, if you use the other method (XML editing) which is not recommended, please share you files with your users.
As we finish designing this software it should make way for the development of PLATONIC ANTIVIRUS which has also been documented on this very blog.
EDIT:
I forgot to add some more info. So here it is :
For those who feel better working with xml files here is the structure.
This version has alot of bug fixes.
Code:
<?xml version="1.0" encoding="UTF-8"?> <Instructubles no_of_commands="1">
<Commands_1 no="1" name="VERY FIRST TEST" information="" iterations="0" target_sdk="0" target_gadget_name="" DATE_ADDED="0000-00-00 00:00:00" textbox1_name="Shell" textbox2_name="" textbox1_enabled="1" textbox1_name="Shell" textbox2_enabled="0" textbox2_name="0">
<Actual_command tool="adb.exe" shell_command="wait-for-device" expected_output="">"Please connect your device"</Actual_command>
<Actual_command tool="adb.exe" shell_command="box1" > </Actual_command>
</Commands_1> </Instructubles>
NB:MAKE SURE YOU UPDATE TABLES AFTER DOWNLOADING
All bugs should be reported to root@digital-dragons.net
RESERVED SHELL WORDS
box1 = This denotes the first user input box.
box2 = This denotes the next user input box.
squote = This denotes a single quotes(').
quote = This denotes double quotes (").
NB: PLEASE DON'T SEND COMMANDS THAT ARE NOT TESTED PERSONALLY!
SCANNED WITH BIT-DEFENDER ANTI-VIRUS
>>>>>>>>>ClickHEREHere<<<<<<<<<<<<<
Screen shots:


Friday, May 15, 2015
How to Burn A bin File Without A Cue ?

You do exactly the same as for iso files, but when you click on “burn image,” you don’t browse to the bin itself, but instead to the cue file, and you open that one.
When the writer starts to burn, it will automatically search for the bin file and start burning it. In fact, the cue file tells the burning program where it can find the bin file that is attached to it. It is VERY IMPORTANT that you use the right cue file when you burn a bin. i.e both cue and bin files that are attached to each other must be located in the same folder, and every bin file has it’s own cue file.
Normally, when you download a bin file, you can download the appropriate cue file as well. If you do not have the cue file (or feel bold) you can make the cue file yourself, which is really easy to do:
a. Open notepad
b. Copy the following text into notepad:
FILE“nameofimage“BINARY
TRACK 01 MODE1/2352
INDEX 01 00:00:00
Where name of image.bin is the name of the bin file you want ot burn.
c. The rest is easy: just save the notepad text with the name of the bin, but with the cue extension.
d. The file should be saved in the same folder as its appropriate bin file and should be something like myfile.cue
Or you can use Alcohol 120% to burn directly from the bin file
Choosing a Good Domain / A perfect One

Choosing A Good Domain Name
Choosing a domain name for your site is one of the most important steps towards creating the perfect internet presence. If you run an on-line business, picking a name that will be marketable and achieve success in search engine placement is paramount. Many factors must be considered when choosing a good domain name. This article summarizes all the different things to consider before making that final registration step!
Short and Sweet
Domain names can be really long or really short (1 - 67 characters). In general, it is far better to choose a domain name that is short in length. The shorter your domain name, the easier it will be for people remember. Remembering a domain name is very important from a marketability perspective. As visitors reach your site and enjoy using it, they will likely tell people about it. And those people may tell others, etc. As with any business, word of mouth is the most powerful marketing tool to drive traffic to your site (and it's free too!). If your site is long and difficult to pronounce, people will not remember the name of the site and unless they bookmark the link, they may never return.
Consider Alternatives
Unless a visitor reaches your site through a bookmark or a link from another site, they have typed in your domain name. Most people on the internet are terrible typists and misspell words constantly. If your domain name is easy to misspell, you should think about alternate domain names to purchase. For example, if your site will be called "MikesTools.com", you should also consider buying "MikeTools.com" and "MikeTool.com". You should also secure the different top level domain names besides the one you will use for marketing purposes ("MikesTools.net", "MikesTools.org", etc.) You should also check to see if there are existing sites based on the misspelled version of the domain name you are considering. "MikesTools.com" may be available, but "MikesTool.com" may be home to a graphic pornography site. You would hate for a visitor to walk away thinking you were hosting something they did not expect.
Also consider domain names that may not include the name of your company, but rather what your company provides. For example, if the name of your company is Mike's Tools, you may want to consider domain names that target what you sell. For example: "buyhammers.com" or "hammer-and-nail.com". Even though these example alternative domain names do not include the name of your company, it provides an avenue for visitors from your target markets. Remember that you can own multiple domain names, all of which can point to a single domain. For example, you could register "buyhammers.com", "hammer-and-nail.com", and "mikestools.com" and have "buyhammers.com" and "hammer-and-nail.com" point to "mikestools.com".
Hyphens: Your Friend and Enemy
Domain name availability has become more and more scant over the years. Many single word domain names have been scooped up which it makes it more and more difficult to find a domain name that you like and is available. When selecting a domain name, you have the option of including hyphens as part of the name. Hyphens help because it allows you to clearly separate multiple words in a domain name, making it less likely that a person will accidentally misspell the name. For example, people are more likely to misspell "domainnamecenter.com" than they are "domain-name-center.com". Having words crunched together makes it hard on the eyes, increasing the likelihood of a misspelling. On the other hand, hyphens make your domain name longer. The longer the domain name, the easier it is for people to forget it altogether. Also, if someone recommends a site to someone else, they may forget to mention that each word in the domain name is separated by a hyphen. If do you choose to leverage hyphens, limit the number of words between the hyphens to three. Another advantage to using hyphens is that search engines are able to pick up each unique word in the domain name as key words, thus helping to make your site more visible in search engine results.
Dot What?
There are many top level domain names available today including .com, .net, .org, and .biz. In most cases, the more unusual the top level domain, the more available domain names are available. However, the .com top level domain is far and away the most commonly used domain on the internet, driven by the fact that it was the first domain extension put to use commercially and has received incredible media attention. If you cannot lay your hands on a .com domain name, look for a .net domain name, which is the second most commercially popular domain name extension.
Long Arm of the Law
Be very careful not to register domain names that include trademarked names. Although internet domain name law disputes are tricky and have few cases in existence, the risk of a legal battle is not a risk worth taking. Even if you believe your domain name is untouchable by a business that has trademarked a name, do not take the chance: the cost of litigation is extremely high and unless you have deep pockets you will not likely have the resources to defend yourself in a court of law. Even stay away from domain names in which part of the name is trademarked: the risks are the same.
Search Engines and Directories
All search engines and directories are different. Each has a unique process for being part of the results or directory listing and each has a different way of sorting and listing domain names. Search engines and directories are the most important on-line marketing channel, so consider how your domain name choice affects site placement before you register the domain. Most directories simply list links to home pages in alphabetical order. If possible, choose a domain name with a letter of the alphabet near the beginning ("a" or "b"). For example, "aardvark-pest-control.com" will come way above "joes-pest-control.com". However, check the directories before you choose a domain name. You may find that the directories you would like be in are already cluttered with domain names beginning with the letter "a". Search engines scan websites and sort results based on key words. Key words are words that a person visiting a search engine actually search on. Having key words as part of your domain name can help you get better results.
How to build a good website

A web standards checklist
The term web standards can mean different things to different people. For some, it is 'table-free sites', for others it is 'using valid code'. However, web standards are much broader than that. A site built to web standards should adhere to standards (HTML, XHTML, XML, CSS, XSLT, DOM, MathML, SVG etc) and pursue best practices (valid code, accessible code, semantically correct code, user-friendly URLs etc).
In other words, a site built to web standards should ideally be lean, clean, CSS-based, accessible, usable and search engine friendly.
About the checklist
This is not an uber-checklist. There are probably many items that could be added. More importantly, it should not be seen as a list of items that must be addressed on every site that you develop. It is simply a guide that can be used:
* to show the breadth of web standards
* as a handy tool for developers during the production phase of websites
* as an aid for developers who are interested in moving towards web standards
The checklist
1.Quality of code
1. Does the site use a correct Doctype?
2. Does the site use a Character set?
3. Does the site use Valid (X)HTML?
4. Does the site use Valid CSS?
5. Does the site use any CSS hacks?
6. Does the site use unnecessary classes or ids?
7. Is the code well structured?
8. Does the site have any broken links?
9. How does the site perform in terms of speed/page size?
10. Does the site have JavaScript errors?
2. Degree of separation between content and presentation
1. Does the site use CSS for all presentation aspects (fonts, colour, padding, borders etc)?
2. Are all decorative images in the CSS, or do they appear in the (X)HTML?
3. Accessibility for users
1. Are "alt" attributes used for all descriptive images?
2. Does the site use relative units rather than absolute units for text size?
3. Do any aspects of the layout break if font size is increased?
4. Does the site use visible skip menus?
5. Does the site use accessible forms?
6. Does the site use accessible tables?
7. Is there sufficient colour brightness/contrasts?
8. Is colour alone used for critical information?
9. Is there delayed responsiveness for dropdown menus (for users with reduced motor skills)?
10. Are all links descriptive (for blind users)?
4. Accessibility for devices
1. Does the site work acceptably across modern and older browsers?
2. Is the content accessible with CSS switched off or not supported?
3. Is the content accessible with images switched off or not supported?
4. Does the site work in text browsers such as Lynx?
5. Does the site work well when printed?
6. Does the site work well in Hand Held devices?
7. Does the site include detailed metadata?
8. Does the site work well in a range of browser window sizes?
5. Basic Usability
1. Is there a clear visual hierarchy?
2. Are heading levels easy to distinguish?
3. Does the site have easy to understand navigation?
4. Does the site use consistent navigation?
5. Are links underlined?
6. Does the site use consistent and appropriate language?
7. Do you have a sitemap page and contact page? Are they easy to find?
8. For large sites, is there a search tool?
9. Is there a link to the home page on every page in the site?
10. Are visited links clearly defined with a unique colour?
6. Site management
1. Does the site have a meaningful and helpful 404 error page that works from any depth in the site?
2. Does the site use friendly URLs?
3. Do your URLs work without "www"?
4. Does the site have a favicon?
1. Quality of code
1.1 Does the site use a correct Doctype?
A doctype (short for 'document type declaration') informs the validator which version of (X)HTML you're using, and must appear at the very top of every web page. Doctypes are a key component of compliant web pages: your markup and CSS won't validate without them.
CODE
http://www.alistapart.com/articles/doctype/
More:
CODE
http://www.w3.org/QA/2002/04/valid-dtd-list.html
CODE
http://css.maxdesign.com.au/listamatic/about-boxmodel.htm
CODE
http://gutfeldt.ch/matthias/articles/doctypeswitch.html
1.2 Does the site use a Character set?
If a user agent (eg. a browser) is unable to detect the character encoding used in a Web document, the user may be presented with unreadable text. This information is particularly important for those maintaining and extending a multilingual site, but declaring the character encoding of the document is important for anyone producing XHTML/HTML or CSS.
CODE
http://www.w3.org/International/tutorials/tutorial-char-enc/
More:
CODE
http://www.w3.org/International/O-charset.html
1.3 Does the site use Valid (X)HTML?
Valid code will render faster than code with errors. Valid code will render better than invalid code. Browsers are becoming more standards compliant, and it is becoming increasingly necessary to write valid and standards compliant HTML.
CODE
http://www.maxdesign.com.au/presentation/sit2003/06.htm
More:
CODE
http://validator.w3.org/
1.4 Does the site use Valid CSS?
You need to make sure that there aren't any errors in either your HTML or your CSS, since mistakes in either place can result in botched document appearance.
CODE
http://www.meyerweb.com/eric/articles/webrev/199904.html
More:
CODE
http://jigsaw.w3.org/css-validator/
1.5 Does the site use any CSS hacks?
Basically, hacks come down to personal choice, the amount of knowledge you have of workarounds, the specific design you are trying to achieve.
CODE
http://www.mail-archive.com/wsg@webstandardsgroup.org/msg05823.html
More:
CODE
http://css-discuss.incutio.com/?page=CssHack
CODE
http://css-discuss.incutio.com/?page=ToHackOrNotToHack
CODE
http://centricle.com/ref/css/filters/
1.6 Does the site use unnecessary classes or ids?
I've noticed that developers learning new skills often end up with good CSS but poor XHTML. Specifically, the HTML code tends to be full of unnecessary divs and ids. This results in fairly meaningless HTML and bloated style sheets.
CODE
http://www.clagnut.com/blog/228/
1.7 Is the code well structured?
Semantically correct markup uses html elements for their given purpose. Well structured HTML has semantic meaning for a wide range of user agents (browsers without style sheets, text browsers, PDAs, search engines etc.)
CODE
http://www.maxdesign.com.au/presentation/benefits/index04.htm
More:
CODE
http://www.w3.org/2003/12/semantic-extractor.html
1.8 Does the site have any broken links?
Broken links can frustrate users and potentially drive customers away. Broken links can also keep search engines from properly indexing your site.
More:
CODE
http://validator.w3.org/checklink
1.9 How does the site perform in terms of speed/page size?
Don't make me wait... That's the message users give us in survey after survey. Even broadband users can suffer the slow-loading blues.
CODE
http://www.websiteoptimization.com/speed/
1.10 Does the site have JavaScript errors?
Internet Explore for Windows allows you to turn on a debugger that will pop up a new window and let you know there are javascript errors on your site. This is available under 'Internet Options' on the Advanced tab. Uncheck 'Disable script debugging'.
2. Degree of separation between content and presentation
2.1 Does the site use CSS for all presentation aspects (fonts, colour, padding, borders etc)?
Use style sheets to control layout and presentation.
CODE
http://www.w3.org/TR/WCAG10/wai-pageauth.html#tech-style-sheets
2.2 Are all decorative images in the CSS, or do they appear in the (X)HTML?
The aim for web developers is to remove all presentation from the html code, leaving it clean and semantically correct.
CODE
http://www.maxdesign.com.au/presentation/benefits/index07.htm
3. Accessibility for users
3.1 Are "alt" attributes used for all descriptive images?
Provide a text equivalent for every non-text element
CODE
http://www.w3.org/TR/WCAG10/wai-pageauth.html#tech-text-equivalent
3.2 Does the site use relative units rather than absolute units for text size?
Use relative rather than absolute units in markup language attribute values and style sheet property values'.
CODE
http://www.w3.org/TR/WCAG10/wai-pageauth.html#tech-relative-units
More:
CODE
http://www.w3.org/TR/WCAG10/wai-pageauth.html#tech-relative-units
CODE
http://www.clagnut.com/blog/348/
3.3 Do any aspects of the layout break if font size is increased?
Try this simple test. Look at your website in a browser that supports easy incrementation of font size. Now increase your browser's font size. And again. And again... Look at your site. Does the page layout still hold together? It is dangerous for developers to assume that everyone browses using default font sizes.
3.4 Does the site use visible skip menus?
A method shall be provided that permits users to skip repetitive navigation links.
CODE
http://www.section508.gov/index.cfm?FuseAction=Content&ID=12
Group related links, identify the group (for user agents), and, until user agents do so, provide a way to bypass the group.
CODE
http://www.w3.org/TR/WCAG10-TECHS/#tech-group-links
...blind visitors are not the only ones inconvenienced by too many links in a navigation area. Recall that a mobility-impaired person with poor adaptive technology might be stuck tabbing through that morass.
CODE
http://joeclark.org/book/sashay/serialization/Chapter08.html#h4-2020
More:
CODE
http://www.niehs.nih.gov/websmith/508/o.htm
3.5 Does the site use accessible forms?
Forms aren't the easiest of things to use for people with disabilities. Navigating around a page with written content is one thing, hopping between form fields and inputting information is another.
CODE
http://www.htmldog.com/guides/htmladvanced/forms/
More:
CODE
http://www.webstandards.org/learn/tutorials/accessible-forms/01-accessible-forms.html
CODE
http://www.accessify.com/tools-and-wizards/accessible-form-builder.asp
CODE
http://accessify.com/tutorials/better-accessible-forms.asp
3.6 Does the site use accessible tables?
For data tables, identify row and column headers... For data tables that have two or more logical levels of row or column headers, use markup to associate data cells and header cells.
CODE
http://www.w3.org/TR/WCAG10/wai-pageauth.html#tech-table-headers
More:
CODE
http://www.bcc.ctc.edu/webpublishing/ada/resources/tables.asp
CODE
http://www.accessify.com/tools-and-wizards/accessible-table-builder_step1.asp
CODE
http://www.webaim.org/techniques/tables/
3.7 Is there sufficient colour brightness/contrasts?
Ensure that foreground and background colour combinations provide sufficient contrast when viewed by someone having colour deficits.
CODE
http://www.w3.org/TR/WCAG10/wai-pageauth.html#tech-colour-contrast
More:
CODE
http://www.juicystudio.com/services/colourcontrast.asp
3.8 Is colour alone used for critical information?
Ensure that all information conveyed with colour is also available without colour, for example from context or markup.
CODE
http://www.w3.org/TR/WCAG10/wai-pageauth.html#tech-colour-convey
There are basically three types of colour deficiency; Deuteranope (a form of red/green colour deficit), Protanope (another form of red/green colour deficit) and Tritanope (a blue/yellow deficit- very rare).
More:
CODE
http://colourfilter.wickline.org/
CODE
http://www.toledo-bend.com/colourblind/Ishihara.html
CODE
http://www.vischeck.com/vischeck/vischeckURL.php
3.9 Is there delayed responsiveness for dropdown menus?
Users with reduced motor skills may find dropdown menus hard to use if responsiveness is set too fast.
3.10 Are all links descriptive?
Link text should be meaningful enough to make sense when read out of context - either on its own or as part of a sequence of links. Link text should also be terse.
CODE
http://www.w3.org/TR/WCAG10/wai-pageauth.html#tech-meaningful-links
4. Accessibility for devices.
4.1 Does the site work acceptably across modern and older browsers?
Before starting to build a CSS-based layout, you should decide which browsers to support and to what level you intend to support them.
CODE
http://www.maxdesign.com.au/presentation/process/index_step01.cfm
4.2 Is the content accessible with CSS switched off or not supported?
Some people may visit your site with either a browser that does not support CSS or a browser with CSS switched off. In content is structured well, this will not be an issue.
4.3 Is the content accessible with images switched off or not supported?
Some people browse websites with images switched off - especially people on very slow connections. Content should still be accessible for these people.
4.4 Does the site work in text browsers such as Lynx?
This is like a combination of images and CSS switched off. A text-based browser will rely on well structured content to provide meaning.
More:
CODE
http://www.delorie.com/web/lynxview
4.5 Does the site work well when printed?
You can take any (X)HTML document and simply style it for print, without having to touch the markup.
CODE
http://www.alistapart.com/articles/goingtoprint/
More:
CODE
http://www.d.umn.edu/itss/support/Training/Online/webdesign/css.html#print
4.6 Does the site work well in Hand Held devices?
This is a hard one to deal with until hand held devices consistently support their correct media type. However, some layouts work better in current hand-held devices. The importance of supporting hand held devices will depend on target audiences.
4.7 Does the site include detailed metadata?
Metadata is machine understandable information for the web
CODE
http://www.w3.org/Metadata/
Metadata is structured information that is created specifically to describe another resource. In other words, metadata is 'data about data'.
4.8 Does the site work well in a range of browser window sizes?
It is a common assumption amongst developers that average screen sizes are increasing. Some developers assume that the average screen size is now 1024px wide. But what about users with smaller screens and users with hand held devices? Are they part of your target audience and are they being disadvantaged?
5. Basic Usability
5.1 Is there a clear visual hierarchy?
Organise and prioritise the contents of a page by using size, prominence and content relationships.
CODE
http://www.great-web-design-tips.com/web-site-design/165.html
5.2 Are heading levels easy to distinguish?
Use header elements to convey document structure and use them according to specification.
CODE
http://www.w3.org/TR/WCAG10/wai-pageauth.html#tech-logical-headings
5.3 Is the site's navigation easy to understand?
Your navigation system should give your visitor a clue as to what page of the site they are currently on and where they can go next.
CODE
http://www.1stsitefree.com/design_nav.htm
5.4 Is the site's navigation consistent?
If each page on your site has a consistent style of presentation, visitors will find it easier to navigate between pages and find information
CODE
http://www.juicystudio.com/tutorial/accessibility/navigation.asp
5.5 Does the site use consistent and appropriate language?
The use of clear and simple language promotes effective communication. Trying to come across as articulate can be as difficult to read as poorly written grammar, especially if the language used isn't the visitor's primary language.
CODE
http://www.juicystudio.com/tutorial/accessibility/clear.asp
5.6 Does the site have a sitemap page and contact page? Are they easy to find?
Most site maps fail to convey multiple levels of the site's information architecture. In usability tests, users often overlook site maps or can't find them. Complexity is also a problem: a map should be a map, not a navigational challenge of its own.
CODE
http://www.useit.com/alertbox/20020106.html
5.7 For large sites, is there a search tool?
While search tools are not needed on smaller sites, and some people will not ever use them, site-specific search tools allow users a choice of navigation options.
5.8 Is there a link to the home page on every page in the site?
Some users like to go back to a site's home page after navigating to content within a site. The home page becomes a base camp for these users, allowing them to regroup before exploring new content.
5.9 Are links underlined?
To maximise the perceived affordance of clickability, colour and underline the link text. Users shouldn't have to guess or scrub the page to find out where they can click.
CODE
http://www.useit.com/alertbox/20040510.html
5.10 Are visited links clearly defined?
Most important, knowing which pages they've already visited frees users from unintentionally revisiting the same pages over and over again.
CODE
http://www.useit.com/alertbox/20040503.html
6. Site management
6.1 Does the site have a meaningful and helpful 404 error page that works from any depth in the site?
You've requested a page - either by typing a URL directly into the address bar or clicking on an out-of-date link and you've found yourself in the middle of cyberspace nowhere. A user-friendly website will give you a helping hand while many others will simply do nothing, relying on the browser's built-in ability to explain what the problem is.
CODE
http://www.alistapart.com/articles/perfect404/
6.2 Does the site use friendly URLs?
Most search engines (with a few exceptions - namely Google) will not index any pages that have a question mark or other character (like an ampersand or equals sign) in the URL... what good is a site if no one can find it?
CODE
http://www.sitepoint.com/article/search-engine-friendly-urls
One of the worst elements of the web from a user interface standpoint is the URL. However, if they're short, logical, and self-correcting, URLs can be acceptably usable
CODE
http://www.merges.net/theory/20010305.html
More:
CODE
http://www.sitepoint.com/article/search-engine-friendly-urls
CODE
http://www.websitegoodies.com/article/32
CODE
http://www.merges.net/theory/20010305.html
6.3 Does the site's URL work without "www"?
While this is not critical, and in some cases is not even possible, it is always good to give people the choice of both options. If a user types your domain name without the www and gets no site, this could disadvantage both the user and you.
6.4 Does the site have a favicon?
A Favicon is a multi-resolution image included on nearly all professionally developed sites. The Favicon allows the webmaster to further promote their site, and to create a more customized appearance within a visitor's browser.
CODE
http://www.favicon.com/
Favicons are definitely not critical. However, if they are not present, they can cause 404 errors in your logs (site statistics). Browsers like IE will request them from the server when a site is bookmarked. If a favicon isn't available, a 404 error may be generated. Therefore, having a favicon could cut down on favicon specific 404 errors. The same is true of a 'robots.txt' file.
Bios Update Procedures
BIOS Update Procedure

All latest Motherboards today, 486/ Pentium / Pentium Pro etc.,ensure that upgrades are easily obtained by incorporating the system BIOS in a FLASH Memory component. With FLASH BIOS, there is no need to replace an EPROM component. Once downloaded, the upgrade utility fits on a floppy disc allowing the user to save, verify and update the system BIOS. A hard drive or a network drive can also be used to run the newer upgrade utilities. However, memory managers can not be installed while upgrading.
Most pre-Pentium motherboards do not have a Flash BIOS. The following instructions therefore do not apply to these boards. If your motherboard does not have a Flash BIOS (EEPROM) you will need to use an EPROM programmer to re-program the BIOS chip. See your dealer for more information about this.
Please read the following instructions in full before starting a Flash BIOS upgrade:
A. Create a Bootable Floppy (in DOS)
•With a non-formatted disk, type the following:
format a:/s
•If using a formatted disk, type:
sys a:
This procedure will ensure a clean boot when you are flashing the new BIOS.
B. Download the BIOS file
•Download the correct BIOS file by clicking on the file name of the BIOS file you wish to download.
•Save the BIOS file and the Flash Utility file in the boot disk you have created. Unzip the BIOS file and the flash utility file. If you don't have an "unzip" utility, download the WinZip for Windows 95 shareware/ evaluation copy for that one time use from _www.winzip.com or _www.pkware.com. Most CD ROMs found in computer magazines, have a shareware version of WinZip on them.
•You should have extracted two files:
Flash BIOS utility eg: flash7265.exe (for example)
BIOS eg: 6152J900.bin (example)
Use the latest flash utility available unless otherwise specified (either on the BIOS update page or in the archive file). This information is usually provided.
C. Upgrade the System BIOS
During boot up, write down the old BIOS version because you will need to use it for the BIOS backup file name.
Place the bootable floppy disk containing the BIOS file and the Flash Utility in drive a, and reboot the system in MS-DOS, preferably Version 6.22
•At the A:> prompt, type the corresponding Flash BIOS utility and the BIOS file with its extension.
For example:
flash625 615j900.bin
•From the Flash Memory Writer menu, select "Y" to "Do you want to save BIOS?" if you want to save (back up) your current BIOS (strongly recommended), then type the name of your current BIOS and its extension after FILE NAME TO SAVE: eg: a:\613J900.bin
Alternatively select "N" if you don't want to save your current BIOS. Beware, though, that you won't be able to recover from a possible failure.
•Select "Y" to "Are you sure to program?"
•Wait until it displays "Message: Power Off or Reset the system"
Once the BIOS has been successfully loaded, remove the floppy disk and reboot the system. If you write to BIOS but cannot complete the procedure, do not switch off, because the computer will not be able to boo, and you will not be given another chance to flash. In this case leave your system on until you resolve the problem (flashing BIOS with old file is a possible solution, provided you've made a backup before)
Make sure the new BIOS version has been loaded properly by taking note of the BIOS identifier as the system is rebooting.
For AMI BIOS
Once the BIOS has been successfully loaded, remove the floppy disk and reboot the system holding the "END" key prior to power on until you enter CMOS setup. If you do not do this the first time booting up after upgrading the BIOS, the system will hang.
BIOS Update Tips
note:
1.Make sure never to turn off or reset your computer during the flash process. This will corrupt the BIOS data. We also recommend that you make a copy of your current BIOS on the bootable floppy so you can reflash it if you need to. (This option is not available when flashing an AMI BIOS).
2. If you have problems installing your new BIOS please check the following:
Have you done a clean boot?
In other words, did you follow the above procedure for making a bootable floppy? This ensures that when booting from "A" there are no device drivers on the diskette. Failing to do a clean boot is the most common cause for getting a "Memory Insufficient" error message when attempting to flash a BIOS.
If you have not used a bootable floppy, insure a clean boot either by
a) pressing F5 during bootup
b) by removing all device drivers on the CONFIG.SYS including the HIMEM.SYS. Do this by using the EDIT command.
Have you booted up under DOS?
Booting in Windows is another common cause for getting a "Memory Insufficient" error message when attempting to flash a BIOS. Make sure to boot up to DOS with a minimum set of drivers. Important: Booting in DOS does not mean selecting "Restart computer in MS-DOS Mode" from Windows98/95 shutdown menu or going to Prompt mode in WindowsNT, but rather following the above procedure (format a: /s and rebooting from a:\).
Have you entered the full file name of the flash utility and the BIOS plus its extension?
Do not forget that often you will need to add a drive letter (a:\) before flashing the BIOS. Example: when asked for file name of new BIOS file which is on your floppy disk, in case you're working from c:\ your will need to type a:\615j900.bin, rather than 615j900.bin only.
PC beep Codes Explained
After repeated requests for beep codes i have decided to post them here maybe they could be pinned
Standard Original IBM POST Error Codes
Code Description

1 short beep System is OK
2 short beeps POST Error - error code shown on screen No beep Power supply or system board problem Continuous beep Power supply, system board, or keyboard problem Repeating short beeps Power supply or system board problem
1 long, 1 short beep System board problem
1 long, 2 short beeps Display adapter problem (MDA, CGA)
1 long, 3 short beeps Display adapter problem (EGA)
3 long beeps 3270 keyboard card
IBM POST Diagnostic Code Descriptions
Code Description
100 - 199 System Board
200 - 299 Memory
300 - 399 Keyboard
400 - 499 Monochrome Display
500 - 599 Colour/Graphics Display
600 - 699 Floppy-disk drive and/or Adapter
700 - 799 Math Coprocessor
900 - 999 Parallel Printer Port
1000 - 1099 Alternate Printer Adapter
1100 - 1299 Asynchronous Communication Device, Adapter, or Port
1300 - 1399 Game Port
1400 - 1499 Colour/Graphics Printer
1500 - 1599 Synchronous Communication Device, Adapter, or Port
1700 - 1799 Hard Drive and/or Adapter
1800 - 1899 Expansion Unit (XT)
2000 - 2199 Bisynchronous Communication Adapter
2400 - 2599 EGA system-board Video (MCA)
3000 - 3199 LAN Adapter
4800 - 4999 Internal Modem
7000 - 7099 Phoenix BIOS Chips
7300 - 7399 3.5" Disk Drive
8900 - 8999 MIDI Adapter
11200 - 11299 SCSI Adapter
21000 - 21099 SCSI Fixed Disk and Controller
21500 - 21599 SCSI CD-ROM System
AMI BIOS Beep Codes
Code Description
1 Short Beep System OK
2 Short Beeps Parity error in the first 64 KB of memory
3 Short Beeps Memory failure in the first 64 KB
4 Short Beeps Memory failure in the first 64 KB Operational of memory
or Timer 1 on the motherboard is not functioning
5 Short Beeps The CPU on the motherboard generated an error
6 Short Beeps The keyboard controller may be bad. The BIOS cannot switch to protected mode
7 Short Beeps The CPU generated an exception interrupt
8 Short Beeps The system video adapter is either missing, or its memory is faulty
9 Short Beeps The ROM checksum value does not match the value encoded in the BIOS
10 Short Beeps The shutdown register for CMOS RAM failed
11 Short Beeps The external cache is faulty
1 Long, 3 Short Beeps Memory Problems
1 Long, 8 Short Beeps Video Card Problems
Phoenix BIOS Beep Codes
Note - Phoenix BIOS emits three sets of beeps, separated by a brief pause.
Code Description
1-1-3 CMOS read/write failure
1-1-4 ROM BIOS checksum error
1-2-1 Programmable interval timer failure
1-2-2 DMA initialisation failure
1-2-3 DMA page register read/write failure
1-3-1 RAM refresh verification failure
1-3-3 First 64k RAM chip or data line failure
1-3-4 First 64k RAM odd/even logic failure
1-4-1 Address line failure first 64k RAM
1-4-2 Parity failure first 64k RAM
2-_-_ Faulty Memory
3-1-_ Faulty Motherboard
3-2-4 Keyboard controller Test failure
3-3-4 Screen initialisation failure
3-4-1 Screen retrace test failure
3-4-2 Search for video ROM in progress
4-2-1 Timer tick interrupt in progress or failure
4-2-2 Shutdown test in progress or failure
4-2-3 Gate A20 failure
4-2-4 Unexpected interrupt in protected mode
4-3-1 RAM test in progress or failure>ffffh
4-3-2 Faulty Motherboard
4-3-3 Interval timer channel 2 test or failure
4-3-4 Time of Day clock test failure
4-4-1 Serial port test or failure
4-4-2 Parallel port test or failure
4-4-3 Math coprocessor test or failure
Low 1-1-2 System Board select failure
Low 1-1-3 Extended CMOS RAM failure
Standard Original IBM POST Error Codes
Code Description
1 short beep System is OK
2 short beeps POST Error - error code shown on screen No beep Power supply or system board problem Continuous beep Power supply, system board, or keyboard problem Repeating short beeps Power supply or system board problem
1 long, 1 short beep System board problem
1 long, 2 short beeps Display adapter problem (MDA, CGA)
1 long, 3 short beeps Display adapter problem (EGA)
3 long beeps 3270 keyboard card
IBM POST Diagnostic Code Descriptions
Code Description
100 - 199 System Board
200 - 299 Memory
300 - 399 Keyboard
400 - 499 Monochrome Display
500 - 599 Colour/Graphics Display
600 - 699 Floppy-disk drive and/or Adapter
700 - 799 Math Coprocessor
900 - 999 Parallel Printer Port
1000 - 1099 Alternate Printer Adapter
1100 - 1299 Asynchronous Communication Device, Adapter, or Port
1300 - 1399 Game Port
1400 - 1499 Colour/Graphics Printer
1500 - 1599 Synchronous Communication Device, Adapter, or Port
1700 - 1799 Hard Drive and/or Adapter
1800 - 1899 Expansion Unit (XT)
2000 - 2199 Bisynchronous Communication Adapter
2400 - 2599 EGA system-board Video (MCA)
3000 - 3199 LAN Adapter
4800 - 4999 Internal Modem
7000 - 7099 Phoenix BIOS Chips
7300 - 7399 3.5" Disk Drive
8900 - 8999 MIDI Adapter
11200 - 11299 SCSI Adapter
21000 - 21099 SCSI Fixed Disk and Controller
21500 - 21599 SCSI CD-ROM System
AMI BIOS Beep Codes
Code Description
1 Short Beep System OK
2 Short Beeps Parity error in the first 64 KB of memory
3 Short Beeps Memory failure in the first 64 KB
4 Short Beeps Memory failure in the first 64 KB Operational of memory
or Timer 1 on the motherboard is not functioning
5 Short Beeps The CPU on the motherboard generated an error
6 Short Beeps The keyboard controller may be bad. The BIOS cannot switch to protected mode
7 Short Beeps The CPU generated an exception interrupt
8 Short Beeps The system video adapter is either missing, or its memory is faulty
9 Short Beeps The ROM checksum value does not match the value encoded in the BIOS
10 Short Beeps The shutdown register for CMOS RAM failed
11 Short Beeps The external cache is faulty
1 Long, 3 Short Beeps Memory Problems
1 Long, 8 Short Beeps Video Card Problems
Phoenix BIOS Beep Codes
Note - Phoenix BIOS emits three sets of beeps, separated by a brief pause.
Code Description
1-1-3 CMOS read/write failure
1-1-4 ROM BIOS checksum error
1-2-1 Programmable interval timer failure
1-2-2 DMA initialisation failure
1-2-3 DMA page register read/write failure
1-3-1 RAM refresh verification failure
1-3-3 First 64k RAM chip or data line failure
1-3-4 First 64k RAM odd/even logic failure
1-4-1 Address line failure first 64k RAM
1-4-2 Parity failure first 64k RAM
2-_-_ Faulty Memory
3-1-_ Faulty Motherboard
3-2-4 Keyboard controller Test failure
3-3-4 Screen initialisation failure
3-4-1 Screen retrace test failure
3-4-2 Search for video ROM in progress
4-2-1 Timer tick interrupt in progress or failure
4-2-2 Shutdown test in progress or failure
4-2-3 Gate A20 failure
4-2-4 Unexpected interrupt in protected mode
4-3-1 RAM test in progress or failure>ffffh
4-3-2 Faulty Motherboard
4-3-3 Interval timer channel 2 test or failure
4-3-4 Time of Day clock test failure
4-4-1 Serial port test or failure
4-4-2 Parallel port test or failure
4-4-3 Math coprocessor test or failure
Low 1-1-2 System Board select failure
Low 1-1-3 Extended CMOS RAM failure
Tuesday, March 17, 2015
Advanced Linux Shell Commands/Tutorials
Running kernel and system information:
# uname -a # Get the kernel version (and BSD version)
# lsb_release -a # Full release info of any LSB distribution
# cat /etc/debian_version # Get Debian version
Use /etc/DISTR-release with DISTR= lsb (Ubuntu) /etc/issue.
# uptime # Show how long the system has been running + load
# hostname # system's host name
# hostname -i # Display the IP address of the host.
# man hier # Description of the file system hierarchy
# last reboot # Show system reboot history
Hardware Informations:
Kernel detected hardware:
# dmesg # Detected hardware and boot messages
# watch 'dmesg | tail -50' # Continuoly print dmesg output
#watch 'dmesg >> /var/log/dmesg.log | tail -1' #Another way
# lsdev # information about installed hardware
# dd if=/dev/mem bs=1k skip=768 count=256 2>/dev/null | strings -n 8 # Read BIOS
# cat /proc/cpuinfo # CPU model
# cat /proc/meminfo # Hardware memory
# grep MemTotal /proc/meminfo # Display the physical memory
# watch -n1 'cat /proc/interrupts' # Watch changeable interrupts continuously
# free -m # Used and free memory (-m for MB)
# cat /proc/devices # Configured devices
# lspci -tv # Show PCI devices
# lsusb -tv # Show USB devices
# lshal # Show a list of all devices with their properties
# dmidecode # Show DMI/SMBIOS: hw info from the BIOS
Load, statistics and messages:
The following commands are useful to find out what is going on on the system.
# top # display and update the top cpu processes
# mpstat 1 # display processors related statistics
# vmstat 2 # display virtual memory statistics
# iostat 2 # display I/O statistics (2 s intervals)
# systat -vmstat 1 # BSD summary of system statistics (1 s intervals)
# systat -tcp 1 # BSD tcp connections (try also -ip)
# systat -netstat 1 # BSD active network connections
# systat -ifstat 1 # BSD network traffic through active interfaces
# systat -iostat 1 # BSD CPU and and disk throughput
# tail -n 500 /var/log/messages # Last 500 kernel/syslog messages
# tail /var/log/warn # System warnings messages see syslog.conf
Users:
# id # Show the active user id with login and group
# last # Show last logins on the system
# who # Show who is logged on the system
# groupadd admin # Add group "admin" and user colin
# useradd -c "Colin Barschel" -g admin -m colin
# usermod -a -G # Add existing user to group (Debian)
# userdel colin # Delete user colin
# pw groupmod admin -m newmembe r # Add a new member to a group
# pw useradd colin -c "Colin Barschel" -g admin -m -s /bin/tcsh
# pw userdel colin; pw groupdel admin
Kernel modules:
# lsmod # List all modules loaded in the kernel
# modprobe isdn # To load a module (here isdn)
Compile Kernel
# cd /usr/src/linux
# make mrproper # Clean everything, including config files
# make oldconfig # Reuse the old .config if existent
# make menuconfig # or xconfig (Qt) or gconfig (GTK)
# make # Create a compressed kernel image
# make modules # Compile the modules
# make modules_install # Install the modules
# make install # Install the kernel
# reboot
Repair grub:
So you broke grub? Boot from a live cd, [find your linux partition under /dev and use fdisk to find the linux partion] mount the linux partition, add /proc and /dev and use grub-install /dev/xyz. Suppose linux lies on /dev/sda4:
# mount /dev/sda6 /mnt # mount the linux partition on /mnt
# mount --bind /proc /mnt/proc # mount the proc subsystem into /mnt
# mount --bind /dev /mnt/dev # mount the devices into /mnt
# chroot /mnt # change root to the linux partition
# grub-install /dev/sda # reinstall grub with your old settings
Listing and PIDs:
Each process has a unique number, the PID. A list of all running process is retrieved with ps.
# ps -auxefw # Extensive list of all running process
However more typical usage is with a pipe or with pgrep:
# ps axww | grep cron
586 ?? Is 0:01.48 /usr/sbin/cron -s
# ps axjf # All processes in a tree format
# ps aux | grep 'ss[h]' # Find all ssh pids without the grep pid
# pgrep -l sshd # Find the PIDs of processes by (part of) name
# echo $$ # The PID of your shell
# fuser -va 22/tcp # List processes using port 22 (Linux)
# pmap PID # Memory map of process (hunt memory leaks) (Linux)
# fuser -va /home # List processes accessing the /home partition
# strace df # Trace system calls and signals
# truss df # same as above
Signals/Kill:
Terminate or send a signal with kill or killall.
# kill -s TERM 4712 # same as kill -15 4712
# killall -1 httpd # Kill HUP processes by exact name
# pkill -9 http # Kill TERM processes by (part of) name
# pkill -TERM -u www # Kill TERM processes owned by www
# fuser -k -TERM -m /home # Kill every process accessing /home (to umount)
Important signals are:
1 HUP (hang up)
2 INT (interrupt)
3 QUIT (quit)
9 KILL (non-catchable, non-ignorable kill)
15 TERM (software termination signal)
Permissions:
Change permission and ownership with chmod and chown. The default umask can be changed for all users in /etc/profile for Linux. The default umask is usually 022. The umask is subtracted from 777, thus umask 022 results in a permission 0f 755.
1 --x execute # Mode 764 = exec/read/write | read/write | read
2 -w- write # For: |-- Owner --| |- Group-| |Oth|
4 r-- read
ugo=a u=user, g=group, o=others, a=everyone
# chmod [OPTION] MODE[,MODE] FILE # MODE is of the form [ugoa]*([-+=]([rwxXst]))
# chmod 640 /var/log/maillog # Restrict the log -rw-r-----
# chmod u=rw,g=r,o= /var/log/maillog # Same as above
# chmod -R o-r /home/* # Recursive remove other readable for all users
# chmod u+s /path/to/prog # Set SUID bit on executable (know what you do!)
# find / -perm -u+s -print # Find all programs with the SUID bit
# chown user:group /path/to/file # Change the user and group ownership of a file
# chgrp group /path/to/file # Change the group ownership of a file
# chmod 640 `find ./ -type f -print` # Change permissions to 640 for all files
# chmod 751 `find ./ -type d -print` # Change permissions to 751 for all directories
Disk information:
# hdparm -I /dev/sda # information about the IDE/ATA disk (Linux)
# fdisk /dev/ad2 # Display and manipulate the partition table
# smartctl -a /dev/ad2 # Display the disk SMART info
System mount points/Disk usage
# mount | column -t # Show mounted file-systems on the system
# df # display free disk space and mounted devices
# cat /proc/partitions # Show all registered partitions
# du -sh * # Directory sizes as listing
# du -csh # Total directory size of the current directory
# du -ks * | sort -n -r # Sort everything by size in kilobytes
Who has which files opened:
This is useful to find out which file is blocking a partition which has to be unmounted and gives a typical error of:
# umount /home/
umount: unmount of /home # umount impossible because a file is locking home
failed: Device busy
# ls -lSr # Show files, biggest last
Find opened files on a mount point with fuser or lsof:
# fuser -m /home # List processes accessing /home
# lsof /home
COMMAND PID USER FD TYPE DEVICE SIZE NODE NAME
tcsh 29029 eedcoba cwd DIR 0,18 12288 1048587 /home/cipi (cipi:/home)
lsof 29140 eedcoba cwd DIR 0,18 12288 1048587 /home/cipi (cipi:/home)
About an application:
ps ax | grep Xorg | awk '{print $1}'
3324
# lsof -p 3324
COMMAND PID USER FD TYPE DEVICE SIZE NODE NAME
Xorg 3324 root 0w REG 8,6 56296 12492 /var/log/Xorg.0.log
About a single file:
# lsof /var/log/Xorg.0.log
COMMAND PID USER FD TYPE DEVICE SIZE NODE NAME
Xorg 3324 root 0w REG 8,6 56296 12492 /var/log/Xorg.0.log
Mount/remount a file system
For example the cdrom. If listed in /etc/fstab:
# mount /cdrom
# mount -t auto /dev/cdrom /mnt/cdrom # typical cdrom mount command
# mount /dev/hdc -t iso9660 -r /cdrom # typical IDE
# mount /dev/scd0 -t iso9660 -r /cdrom # typical SCSI cdrom
# mount /dev/sdc0 -t ntfs-3g /windows # typical SCSI
Entry in /etc/fstab:
/dev/cdrom /media/cdrom subfs noauto,fs=cdfss,ro,procuid,nosuid,nodev,exec 0 0
Add swap on-the-fly
Suppose you need more swap (right now), say a 2GB file /swap2gb .
# dd if=/dev/zero of=/swap2gb bs=1024k count=2000
# mkswap /swap2gb # create the swap area
# swapon /swap2gb # activate the swap. It now in use
# swapoff /swap2gb # when done deactivate the swap
# rm /swap2gb
Mount an SMB share
Suppose we want to access the SMB share myshare on the computer smbserver, the address as typed on a Windows PC is \\smbserver\myshare\. We mount on /mnt/smbshare. Warning> cifs wants an IP or DNS name, not a Windows name.
# smbclient -U user -I 192.168.16.229 -L //smbshare/ # List the shares
# mount -t smbfs -o username=winuser //smbserver/myshare /mnt/smbshare
# mount -t cifs -o username=winuser,password=winpwd //192.168.16.229/myshare /mnt/share
Additionally with the package mount.cifs it is possible to store the credentials in a file, for example /home/user/.smb:
username=winuser
password=winpwd
And mount as follow:
# mount -t cifs -o credentials=/home/user/.smb //192.168.16.229/myshare /mnt/smbshare
Mount an image:
# mount -t iso9660 -o loop file.iso /mnt # Mount a CD image
# mount -t ext3 -o loop file.img /mnt # Mount an image with ext3 fs
Create a memory file system:
A memory based file system is very fast for heavy IO application. How to create a 64 MB partition mounted on /memdisk:
# mount -t tmpfs -osize=64m tmpfs /memdisk
Disk performance:
Read and write a 1 GB file on partition ad4s3c (/home)
# time dd if=/dev/ad4s3c of=/dev/null bs=1024k count=1000
# time dd if=/dev/zero bs=1024k count=1000 of=/home/1Gb.file
# hdparm -tT /dev/hda # Linux only
Networking:
# ethtool eth0 # Show the ethernet status (replaces mii-diag)
# ethtool -s eth0 speed 100 duplex full # Force 100Mbit Full duplex
# ethtool -s eth0 autoneg off # Disable auto negotiation
# ethtool -p eth1 # Blink the ethernet led - very useful when supported
# ip link show # Display all interfaces on Linux (similar to ifconfig)
# ip link set eth0 up # Bring device up (or down). Same as "ifconfig eth0 up"
# ip addr show # Display all IP addresses on Linux (similar to ifconfig)
# ip neigh show # Similar to arp -a
Ports in use:
Listening open ports:
# netstat -an | grep LISTEN
# lsof -i # List all Internet connections
# socklist # Display list of open sockets
# netstat -anp --udp --tcp | grep LISTEN
# netstat -tup # List active connections to/from system
# netstat -tupl # List listening ports from system
Firewall
Check if a firewall is running (typical configuration only):
# iptables -L -n -v # For status Open the iptables firewall
# iptables -P INPUT ACCEPT # Open everything
# iptables -P FORWARD ACCEPT
# iptables -P OUTPUT ACCEPT
# iptables -Z # Zero the packet and byte counters in all chains
# iptables -F # Flush all chains
# iptables -X # Delete all chains
IP Forward for routing
Check and then enable IP forward with :
# cat /proc/sys/net/ipv4/ip_forward # Check IP forward 0=off, 1=on
# echo 1 > /proc/sys/net/ipv4/ip_forward
or edit /etc/sysctl.conf with:
net.ipv4.ip_forward = 1
Network Address Translation
# iptables -t nat -A POSTROUTING -o eth0 -j MASQUERADE # to activate NAT
# iptables -t nat -A PREROUTING -p tcp -d 78.31.70.238 --dport 20022 -j DNAT \
--to 192.168.16.44:22 # Port forward 20022 to internal IP port ssh
# iptables -t nat -A PREROUTING -p tcp -d 78.31.70.238 --dport 993:995 -j DNAT \
--to 192.168.16.254:993-995 # Port forward of range 993-995
# ip route flush cache
# iptables -L -t nat # Check NAT status
DNS
The DNS entries are valid for all interfaces and are stored in /etc/resolv.conf. The domain to which the host belongs is also stored in this file. A minimal configuration is:
nameserver 66.63.128.84
search cipi.net intern.lab
domain cipi.org
Check the system domain name with:
# hostname -d # Same as dnsdomainname
DHCP
# dhcpcd -n eth0 # Trigger a renew (does not always work)
# dhcpcd -k eth0 # release and shutdown
The lease with the full information is stored in:
/var/lib/dhcpcd/dhcpcd-eth0.info
tar
The command tar (tape archive) creates and extracts archives of file and directories. The archive .tar is uncompressed, a compressed archive has the extension .tgz or .tar.gz (zip) or .tbz (bzip2). Do not use absolute path when creating an archive, you probably want to unpack it somewhere else. Some typical commands are:
Create
# cd /
# tar -cf home.tar home/ # archive the whole /home directory (c for create)
# tar -czf home.tgz home/ # same with zip compression
# tar -cjf home.tbz home/ # same with bzip2 compression
Only include one (or two) directories from a tree, but keep the relative structure. For example archive /usr/local/etc and /usr/local/www and the first directory in the archive should be local/.
# tar -C /usr -czf local.tgz local/etc local/www
# tar -C /usr -xzf local.tgz # To untar the local dir into /usr
# cd /usr; tar -xzf local.tgz # Is the same as above
Extract
# tar -tzf home.tgz # look inside the archive without extracting (list)
# tar -xf home.tar # extract the archive here (x for extract)
# tar -xzf home.tgz # same with zip compression (-xjf for bzip2 compression)
# remove leading path gallery2 and extract into gallery
# tar --strip-components 1 -zxvf gallery2.tgz -C gallery/
# tar -xjf home.tbz home/colin/file.txt # Restore a single file
More advanced
# tar c dir/ | gzip | ssh user@remote 'dd of=dir.tgz' # arch dir/ and store remotely.
# tar cvf - `find . -print` > backup.tar # arch the current directory.
# tar -cf - -C /etc . | tar xpf - -C /backup/etc # Copy directories
# tar -cf - -C /etc . | ssh user@remote tar xpf - -C /backup/etc # Remote copy.
# tar -czf home.tgz --exclude '*.o' --exclude 'tmp/' home/
Find
Some important options:
-x (on BSD) -xdev (on Linux) Stay on the same file system (dev in fstab).
-exec cmd {} \; Execute the command and replace {} with the full path
-iname Like -name but is case insensitive
-ls Display information about the file (like ls -la)
-size n n is +-n (k M G T P)
-cmin n File's status was last changed n minutes ago.
# find . -type f ! -perm -444 # Find files not readable by all
# find . -type d ! -perm -111 # Find dirs not accessible by all
# find /home/user/ -cmin 10 -print # Files created or modified in the last 10 min.
# find . -name '*.[ch]' | xargs grep -E 'expr' # Search 'expr' in this dir and below.
# find / -name "*.core" | xargs rm # Find core dumps and delete them (also try core.*)
# find / -name "*.core" -print -exec rm {} \; # Other syntax
# Find images and create an archive, iname is not case sensitive. -r for append
# find . \( -iname "*.png" -o -iname "*.jpg" \) -print -exec tar -rf images.tar {} \;
# find . -type f -name "*.txt" ! -name README.txt -print # Exclude README.txt files
# find /var/ -size +10M -exec ls -lh {} \; # Find large files > 10 MB
# find /var/ -size +10M -ls # This is simpler
# find . -size +10M -size -50M -print
# find /usr/ports/ -name work -type d -print -exec rm -rf {} \; # Clean the ports
# Find files with SUID; those file are vulnerable and must be kept secure
# find / -type f -user root -perm -4000 -exec ls -l {} \;
Miscellaneous
# which command # Show full path name of command
# time command # See how long a command takes to execute
# time cat # Use time as stopwatch. Ctrl-c to stop
# set | grep $USER # List the current environment
# cal -3 # Display a three month calendar
# date [-u|--utc|--universal] [MMDDhhmm[[CC]YY][.ss]]
# date 10022155 # Set date and time
# whatis grep # Display a short info on the command or word
# whereis java # Search path and standard directories for word
# setenv varname value # Set env. variable varname to value (csh/tcsh)
# export varname="value" # set env. variable varname to value (sh/ksh/bash)
# pwd # Print working directory
# mkdir -p /path/to/dir # no error if existing, make parent dirs as needed
# mkdir -p project/{bin,src,obj,doc/{html,man,pdf},debug/some/more/dirs}
# rmdir /path/to/dir # Remove directory
# rm -rf /path/to/dir # Remove directory and its content (force)
# rm -- -badchar.txt # Remove file whitch starts with a dash (-)
# cp -la /dir1 /dir2 # Archive and hard link files instead of copy
# cp -lpR /dir1 /dir2 #
# cp unixtoolbox.xhtml{,.bak} # Short way to copy the file with a new extension
# mv /dir1 /dir2 # Rename a directory
# ls -1 # list one file per line
# history | tail -50 # Display the last 50 used commands
# cd - # cd to previous ($OLDPWD) directory
Add/Remove software
Debian/Ubuntu/Mint
# apt-get update # First update the package lists
# apt-get install emacs # Install the package emacs
# dpkg --remove emacs # Remove the package emacs
# dpkg -S file # find what package a file belongs to
Tags: Simple and advanced Shell tutorial for advances and newbie users.
Thursday, March 12, 2015
Unhide Files Hidden by Malware
Through the File's or Folder's Properties Page
1.To Hide a File or FolderA) Right click on the file or folder, and click on Properties.3. To Unhide a File or Folder
B) Check the Hidden box, and click on OK. (see screenshots below)C) If this is for a folder and it has a subfolder or file in it, then you will also need to select (dot) to only hide the folder or to hide the folder and all of it's subfolders and files in it. Click on OK. (see screenshot below)

D) In Folder Options, make sure that Don't Show hidden files, folders, and drives is selected (dotted).
A) Open Folder Options, select (dot) Show hidden files, folders, and drives, and click on OK. (see screenshot below)
NOTE: This way you will be able to see the hidden file or folder to be able to unhide it.B) Right click on the file or folder, and click on Properties.
C) Uncheck the Hidden box and click on OK. (see screenshots below step 2B)
D) If this is for a folder and it has a subfolder or file in it, then you will also need to select (dot) to only unhide the folder or to unhide the folder and all of it's subfolders and files in it. Click on OK. (see screenshot below step 2C)
E) In Folder Options, select (dot) Don't Show hidden files, folders, and drives, and click on OK. (see screenshot below step 3A)


 OPTION TWO
This will show you how to hide or unhide a file or folder using the ATTRIB command.

While you can run this command in a non-elevated or elevated command prompt, you would get the best results using a elevated command prompt.
While you can run this command in a non-elevated or elevated command prompt, you would get the best results using a elevated command prompt.
1. Open a elevated command prompt, then do either step 2, 3, 4, 5, 6, 7, or 8 below for what you would like to do.
2. To Hide a specific FileA) Open Folder Options and uncheck the Hide extensions for known file types option and click on OK. (see screenshot below)4. To Unhide a specific File
NOTE: This way you will be able to see the file extension in your file's name to use in the command below.B) In the command prompt, type the command below and press enter.
NOTE: Substitute Full Path of File with extension within quotes below with your files's full path and name with the extension included within quotes instead.
NOTE: For example, if I wanted to hide a text file named File with the file extension .txt on my desktop, I would type this command below.Code:ATTRIB +H "Full Path of File with extension"
Code:ATTRIB +H "C:\Users\UserName\Desktop\File.txt"C) In Folder Options, make sure that Don't Show hidden files, folders, and drives is selected (dotted).
D) The file should now be hidden. Go to step 7.
A) Open Folder Options and uncheck the Hide extensions for known file types option and click on OK. (see screenshot below step 3A)5. To Hide a specific Folder
NOTE: This way you will be able to see the file extension in your file's name to use in the command below.
B) In the command prompt, type the command below and press enter.
NOTE: Substitute Full Path of File with extension within quotes below with your files's full path and name with the extension included within quotes instead.
NOTE: For example, if I wanted to unhide a hidden text file named File with the file extension .txt on my desktop, I would type this command below.Code:ATTRIB -H "Full Path of File with extension"
Code:ATTRIB -H "C:\Users\UserName\Desktop\File.txt"C) The file should now be unhidden. Go to step 7.
A) In the command prompt, type the command below and press enter.6. To Unhide a specific Folder
NOTE: Substitute Full Path of Folder within quotes below with your folder's full path within quotes instead.
NOTE: For example, if I wanted to hide a folder named Folder on my desktop, I would type this command below.Code:ATTRIB +H "Full Path of Folder" /S /D
Code:ATTRIB +H "C:\Users\UserName\Desktop\Folder" /S /DB) In Folder Options, make sure that Don't Show hidden files, folders, and drives is selected (dotted).
C) The folder should now be hidden. Go to step 7.
A) In the command prompt, type the command below and press enter.7. To Hide a Folder and all Contents in the Folder
NOTE: Substitute Full Path of Folder within quotes below with your folder's full path within quotes instead.
NOTE: For example, if I wanted to unhide a hidden folder named Folder on my desktop, I would type this command below.Code:ATTRIB -H "Full Path of Folder" /S /D
Code:ATTRIB -H "C:\Users\UserName\Desktop\Folder" /S /DB) The folder should now be unhidden.
NOTE: This will hide the selected folder along with all subfolders and files inside this folder.A) In the command prompt, type the command below and press enter.8. To Unhide a Folder and all Contents in the Folder
NOTE: Substitute Full Path of Folder within quotes below with your folder's full path within quotes instead.
NOTE: For example, if I wanted to hide a folder named Folder on my desktop along with all of it's contents, I would type this command below.Code:ATTRIB +H "Full Path of Folder\*" /S /D
Code:ATTRIB +H "C:\Users\UserName\Desktop\Folder\*" /S /DB) In Folder Options, make sure that Don't Show hidden files, folders, and drives is selected (dotted).
C) The folder should now be hidden. Go to step 7.
NOTE: This will unhide the selected folder along with all subfolders and files inside this folder.A) In the command prompt, type the command below and press enter.
NOTE: Substitute Full Path of Folder within quotes below with your folder's full path within quotes instead.
9. When done, close the command prompt.NOTE: For example, if I wanted to unhide a hidden folder named Folder on my desktop and all of it's contents, I would type this command below.Code:ATTRIB -H "Full Path of Folder\*" /S /D
Code:ATTRIB -H "C:\Users\UserName\Desktop\Folder\*" /S /DB) The folder should now be unhidden.


Or
Try to kill first the Autorun file.Follow the steps below to do that:
Step 1:
Click on the below link and download the file "AutorunExterminator"
http://en.kioskea.net/download/download-11613-autorun-exterminator
Extract it --> Double-click on "AutorunExterminator" --> Plug your External
hard drive now.
This will remove the autorun.inf files from your External hard drive and also from
the drives.
http://en.kioskea.net/download/download-11613-autorun-exterminator
Extract it --> Double-click on "AutorunExterminator" --> Plug your External
hard drive now.
This will remove the autorun.inf files from your External hard drive and also from
the drives.
Step 2:
Click on "Start" -->Run --> type cmd and click on OK.
Here I assume your External hard drive as G:
Enter this command.
attrib -h -r -s /s /d g:\*.*
You can copy the above command --> Right-click in the Command Prompt and
paste it.
Note : Replace the letter g with your External hard drive letter.
Here I assume your External hard drive as G:
Enter this command.
attrib -h -r -s /s /d g:\*.*
You can copy the above command --> Right-click in the Command Prompt and
paste it.
Note : Replace the letter g with your External hard drive letter.
Now check for your files in External Drive.
Step 3:
After that, download the Malwarebytes' Anti-Malware from the below link
http://en.kioskea.net/download/download-105-malwarebytes-anti-malware
Update it --> Perform "Full Scan"
Note : Default selected option is "Quick Scan".
Good Luck.
http://en.kioskea.net/download/download-105-malwarebytes-anti-malware
Update it --> Perform "Full Scan"
Note : Default selected option is "Quick Scan".
Good Luck.
Subscribe to:
Posts (Atom)